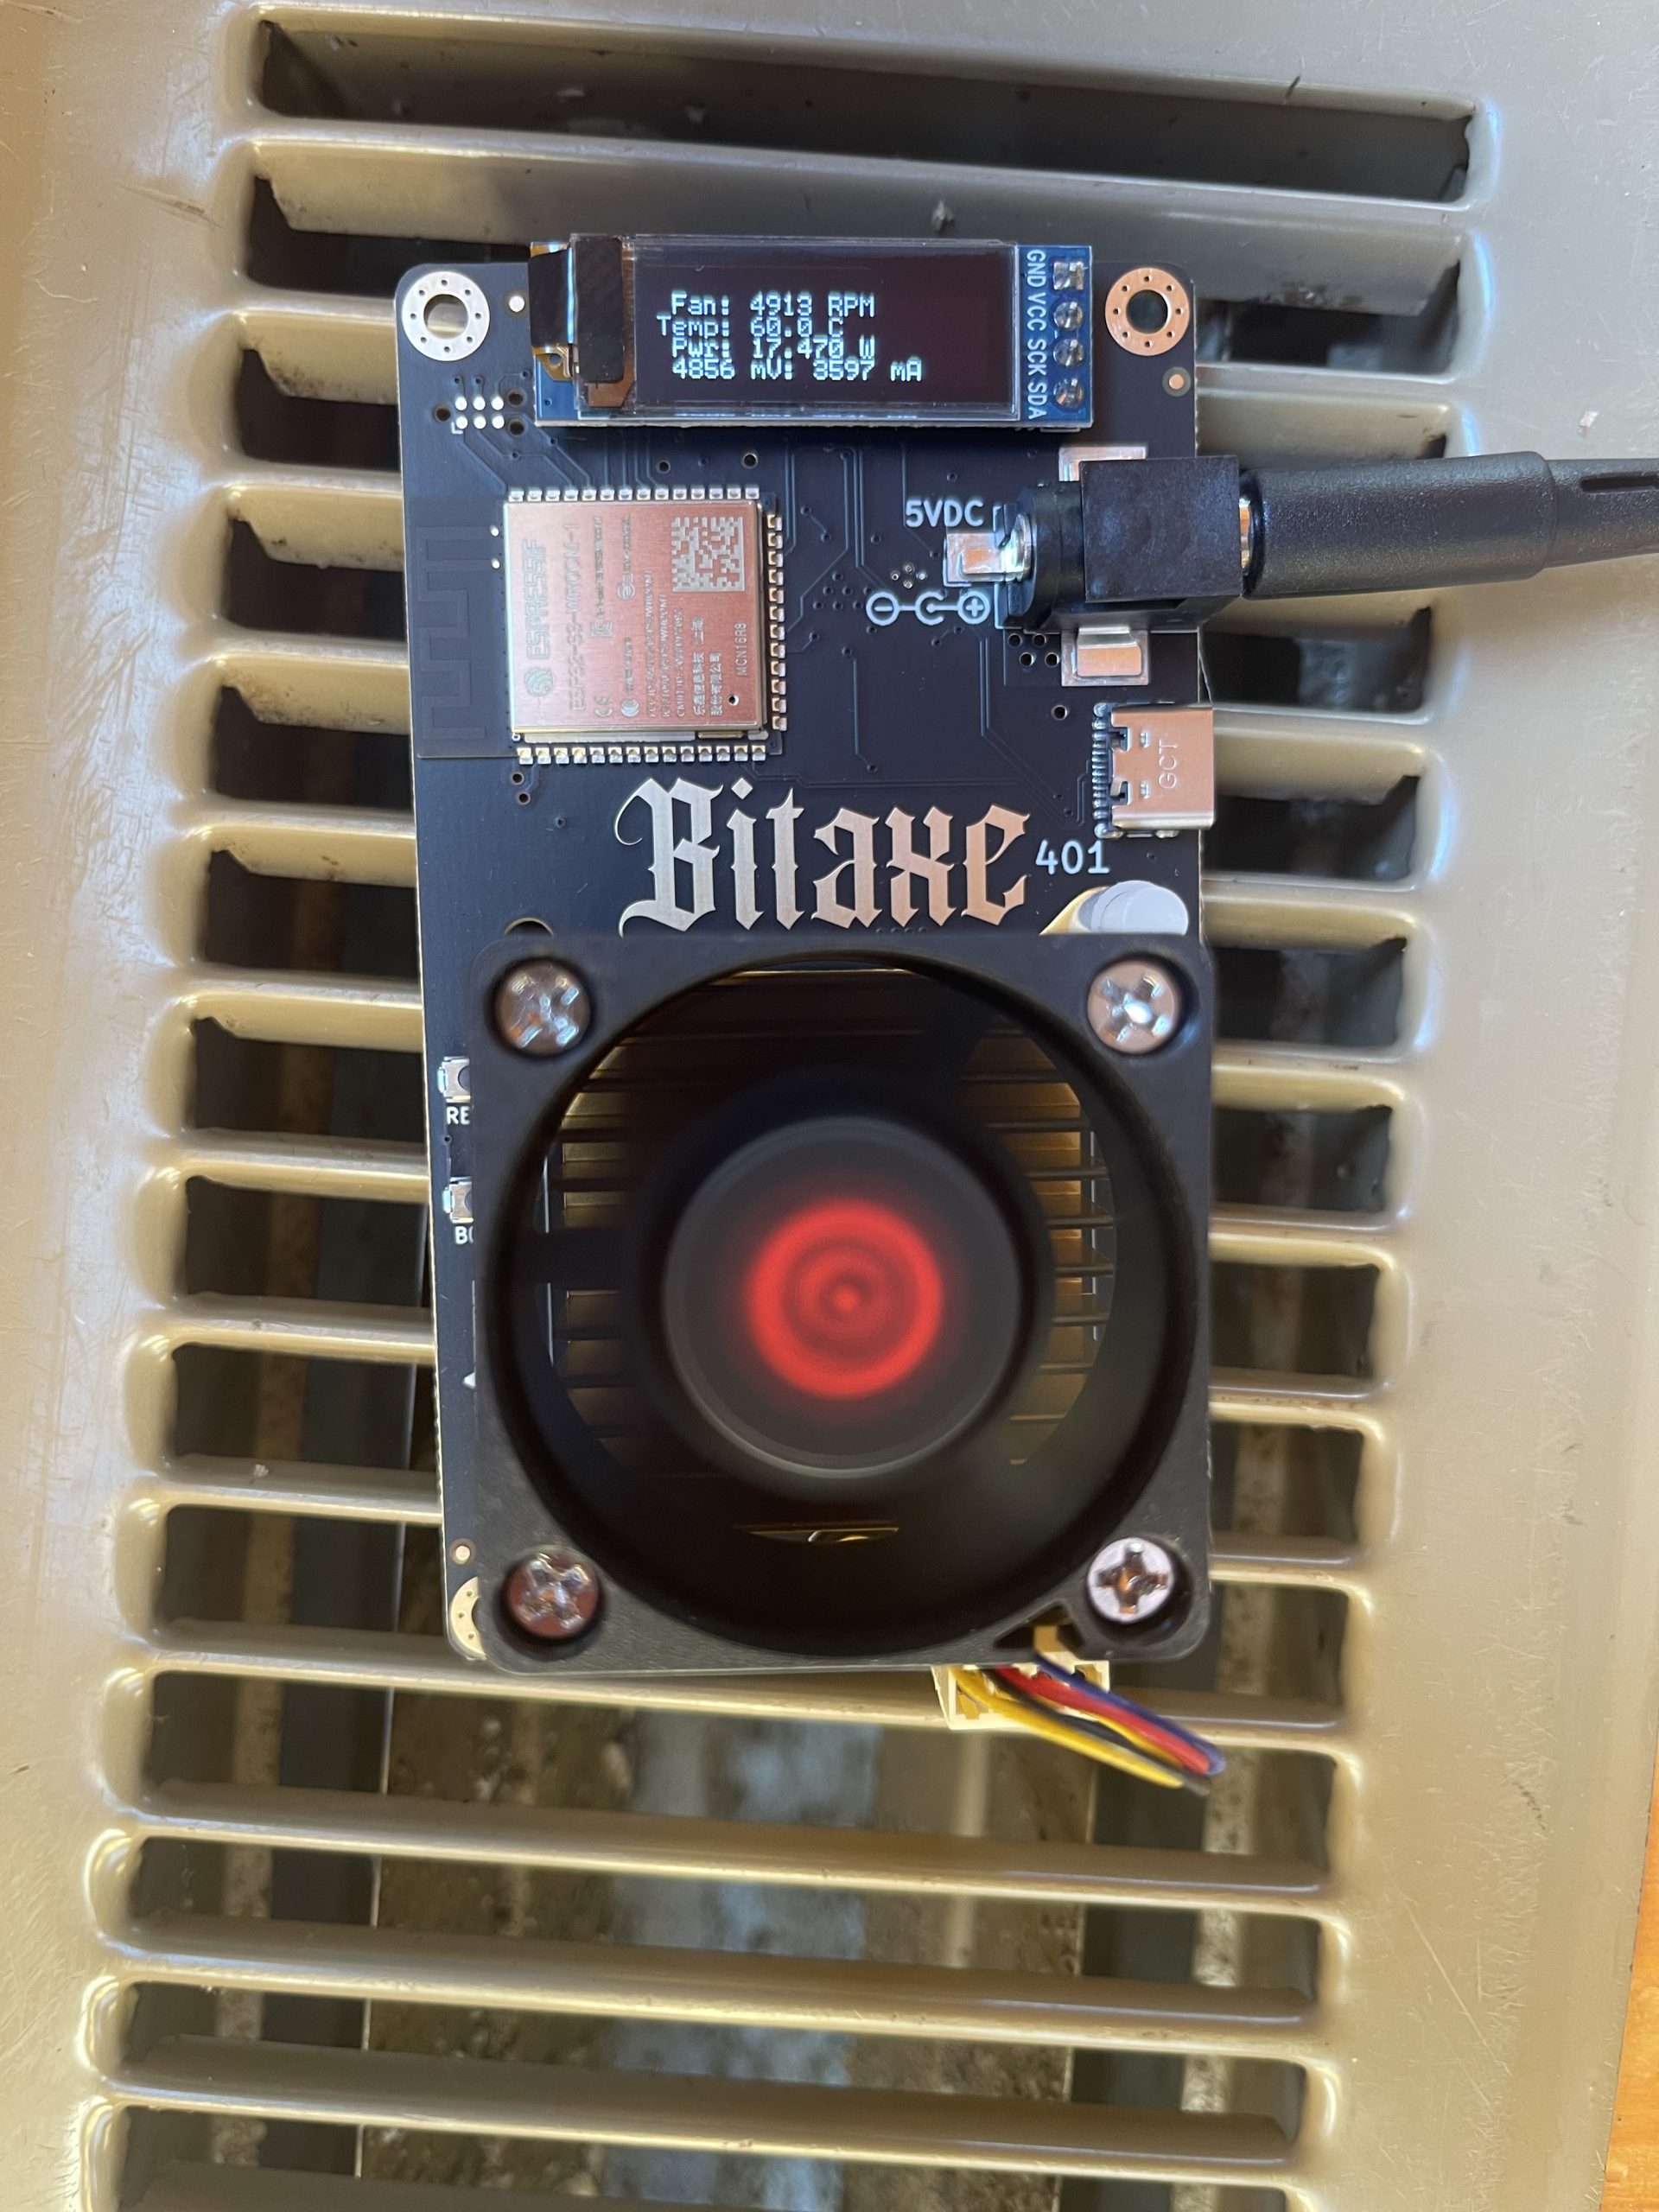
I bought a Bitaxe 401 Supra the other day to get myself acclimated to bitcoin mining. This Bitaxe is setup running AxeOS.
The nice thing about the 401 Supra is that it’s very efficient and runs at about 17-20 w/TH (that’s the amount of electric consumed per hashing power). It’s also using the BM1368 ASIC chip which is currently one of the highest end bitcoin mining chips around (as of this writing).
Now, the Bitaxe itself doesn’t have a massive amount of computing power. It’s only doing about 700-800 GH/s (compared to the 200+ of the Antminer 21). It’s value is the low cost to entry and ease of use (works on standard household electric plugs). I paid about $158 for the device. Whereas the Antiminer 21 (which is more than 200x more powerful) costs around $5,500 as of this writing).
The Default Solo Pool
Out of the box, Bitaxe is designed to run on a solo public pool. This means that the only rewards you will get are if you, on your own, earn a reward. And the likelihood of this is very low. You could run your bitaxe for years without any reward.
I ran my Bitaxe for a week using the solo public pool and then it started to feel boring. I started to wonder whether I could integrate it into a shared pool and at least start earning some rewards.
Assigning Your Bitaxe to a Shared Pool
I was not able to find any instructions for setting up AxeOs to run on a shared pool so I decided to just try. I signed up with a pool called Lincoin for a different project I was doing and noticed that they had a button that said “Connect to Pool” so I clicked it.
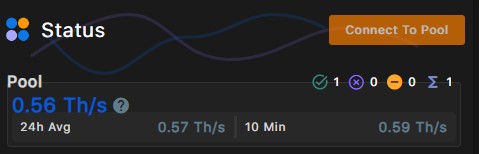
After clicking “Connect to Pool” it showed me some values that looked similar to what AxeOS requests on its settings page. Here are the values that Lincoin shows me to use. No matter which shared pool you use, the important values are the address, the port and the username.
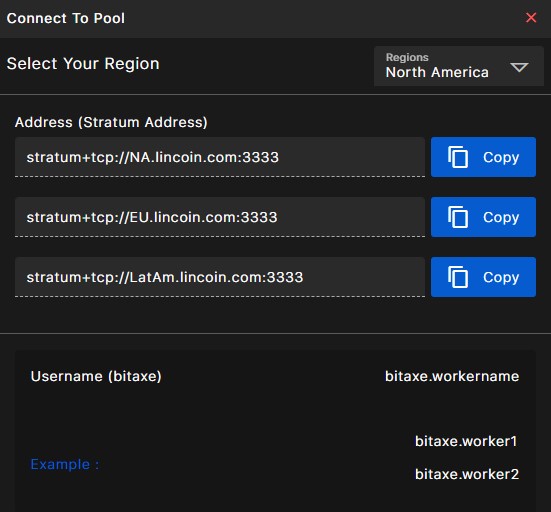
One thing to note for the addrses: when you go to AxeOS to input your values you leave off the “stratum+tcp://” part of the address. You also leave off the “:3333” in the address field and save it for the port field.
Here are the AxeOS settings. For Hostname, this is just whatever you chose when setup your Bitaxe. The WiFI SSID is your home wifi. And the password is your home wifi password.

For Stratum URL, you choose the correct link that you get from your shared pool.
For Stratum Port, you choose the port number given to you by your shared pool.
For Stratum user, you choose the username as specified by your shared pool
For password, I find that you can use anything. If you shared pool says to leave it blank, and AxeOS doesn’t allow it to stay blank, it should still work with any password you type in.
Once you’ve made the changes click Save. Then click Restart to get your Bitaxe running on the new pool.
Finally, after about 5 minutes, verify that your shared pool is seeing your bitaxe.